
How to Make Customized Frames in Publicity Poster
Step-by-step tutorial on creating personalized frames in Publicity Poster.
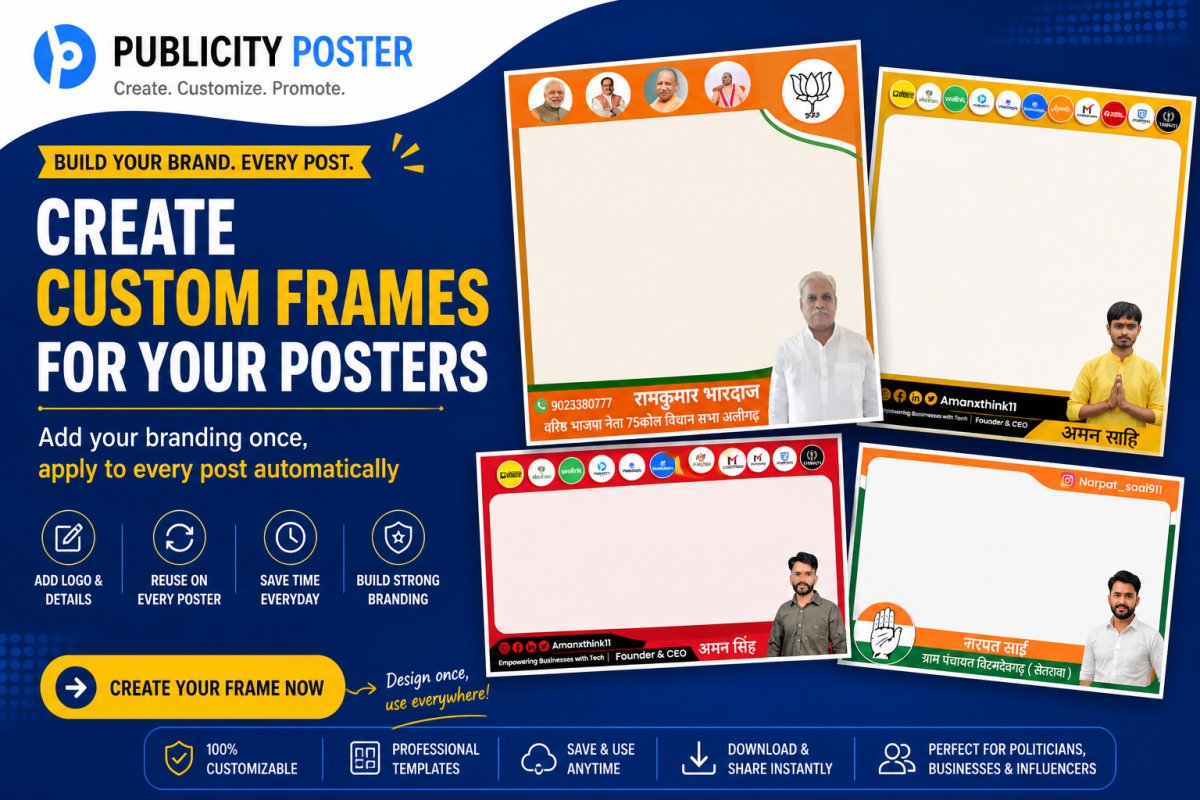
When it comes to creating eye-catching publicity posters, every detail counts — and frames are no exception. Whether you're promoting an event, a political campaign, or a product launch, customized frames can give your poster that professional polish and personal flair that grabs attention fast.
In this guide, we’ll walk you through the step-by-step process of making personalized frames in your publicity poster designs, using simple tools and smart design tips. No fancy design degree needed — just creativity and a little patience!
Why Frames Matter in Publicity Posters
Before we jump into the how-to, let’s quickly talk about the why.
Frames aren’t just decorative borders. They:
-
Highlight key elements like faces, logos, or event details
-
Create visual balance and structure
-
Draw the eye inward, helping your audience focus on the message
-
Add branding consistency with shapes, colors, and motifs
A well-designed frame can turn a basic poster into a scroll-stopper — both online and on the street.
What You’ll Need
To make a custom frame, you don’t need complex software (unless you want to go full pro). Here are a few popular tools you can use:
-
Canva (great for beginners)
-
Adobe Photoshop or Illustrator (for advanced design)
-
Figma (for collaboration and flexibility)
-
Crello / VistaCreate (another beginner-friendly option)
-
PosterMyWall or Pixlr (online editors with free templates)
Step-by-Step: How to Create Customized Frames in Your Publicity Poster
Step 1: Start with a Clear Poster Layout
Before adding a frame, make sure your poster’s layout is solid. Define:
-
The headline or campaign slogan
-
Subtext or key message
-
Images (e.g., speaker headshots, product photos)
-
Call to action (CTA)
-
Brand elements (logo, color scheme, etc.)
Your frame should enhance — not distract from — these core elements.
Use grid lines or guides to keep everything aligned neatly.
Step 2: Choose the Frame Style
Here’s where you get creative. Decide on a frame that suits your message and audience. Some ideas:
-
Classic Border Frame – Simple rectangles, ideal for corporate or political posters
-
Brush Stroke Frame – Artistic and casual, great for music events or youth campaigns
-
Geometric Frames – Angular, modern, and bold
-
Thematic Frames – Use icons, flags, party symbols, or relevant graphics to decorate the border
-
Photo Frame Style – Wrap a headshot or logo in a shaped frame (circle, star, hexagon)
Choose a style that complements your poster’s tone. A business seminar poster needs a different look than a college fest!
Step 3: Add the Frame to Your Design
In Canva or PosterMyWall:
-
Open your poster design or choose a template.
-
Go to Elements or Shapes.
-
Select a frame shape (rectangle, circle, etc.) or search for “frame border”.
-
Resize and position it to wrap around your content.
-
Customize the color, thickness, and transparency.
In Photoshop:
-
Create a new layer.
-
Use the Rectangle Tool (or custom shape) to draw your frame.
-
Adjust Stroke settings for border thickness.
-
Use Layer Styles for shadows, glows, or textures.
-
Use the Mask Tool to create creative cutouts or effects.
Step 4: Personalize with Colors and Branding
Your frame should match your brand's color palette or campaign theme. Use:
-
Gradient colors for a modern, dynamic look
-
Party colors (in political posters) to reinforce recognition
-
Event-specific hues for festive or seasonal relevance
If you’re creating multiple posters, save your frame as a template to reuse across designs — that’s how you stay consistent.
Step 5: Add Decorative Elements (Optional)
Want to go the extra mile? Add some stylish touches:
-
Icons or mini-logos on the frame corners
-
Brush strokes or torn paper effects
-
3D shadows to make the frame “pop”
-
Animated effects (for digital posters or reels)
Just don’t overdo it. Simplicity often wins.
Step 6: Export and Test Your Poster
Once your frame looks great, export your poster in high resolution (PNG for digital, PDF for print). Before publishing:
-
Zoom out to see the overall visual flow
-
Test visibility from a distance (especially for printed posters)
-
Get feedback from a colleague or friend
Make sure your frame supports the message — not overwhelms it.
Framing is Storytelling
At the end of the day, your frame isn’t just a border — it’s part of the story you’re telling. A clean, bold frame can make your message pop. A creative, themed frame can create instant emotional connection.
Whether you’re promoting a local event, running a political campaign, or launching a product, customized frames can elevate your poster game from amateur to impactful.
What's Your Reaction?
 Like
0
Like
0
 Dislike
0
Dislike
0
 Love
0
Love
0
 Funny
0
Funny
0
 Wow
0
Wow
0
 Sad
0
Sad
0
 Angry
0
Angry
0
Hi, I’m Kalpana 👋 A passionate content writer who loves turning ideas into simple, engaging, and result-driven content. I specialize in creating blog posts, marketing content, and practical guides that help businesses grow and connect with their audience. My focus is always on clarity, value, and writing that actually makes an impact—not just fills space. At Publicity Poster, I write content that helps businesses understand how to promote themselves better, create stunning posters, and grow faster using smart tools. When I’m not writing, I enjoy exploring new ideas, learning about marketing trends, and finding better ways to communicate complex things in simple words. 💡 I believe: Great content is simple, useful, and powerful.


Comments (0)